

Essential Guide: How to Clean and Maintain Your Shower Chair
Posted On: August 7, 2026
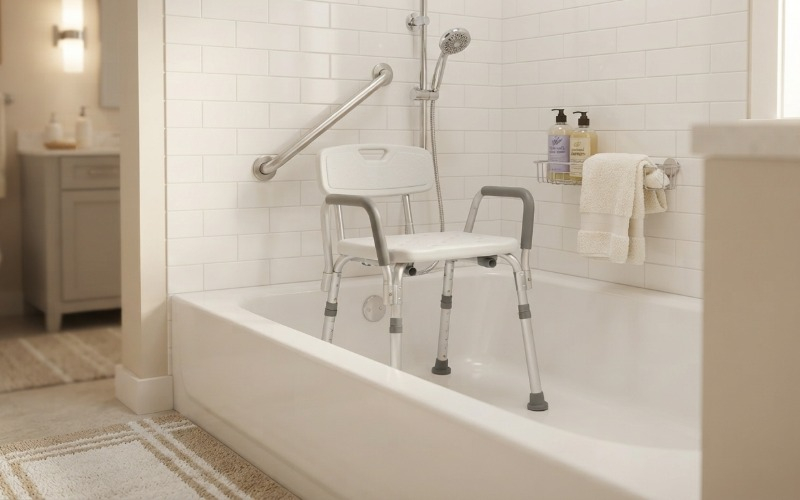
Shower Chair Care and Maintenance Guide
Essential steps for maintaining, cleaning, and inspecting your bathroom safety equipment.
A shower chair is one of the most effective bathroom safety aids for reducing fall risks and maintaining independence during personal care. However, soap residue, hard water, and moisture can build up in drainage holes, rubber feet, and connection points over time. Establishing a routine cleaning and inspection schedule ensures your equipment remains stable, hygienic, and secure.
Whether you rely on a shower chair with back support, transfer benches, or basic bath seats, keeping your equipment in top condition takes only a few simple steps.
If your current seating shows signs of severe wear or instability, you can explore our complete selection of Binson's Shower Chairs online or visit one of our physical retail stores to test out models with our knowledgeable staff.
What You’ll Need
Before starting, gather the following mild, non-abrasive supplies:
- Mild dish soap or gentle bathroom cleaner
- Warm water and a soft sponge or microfiber cloth
- Soft-bristle brush (or old toothbrush) for tight joints
- White vinegar (for hard water mineral deposits)
- Disinfecting spray or wipes
- Clean towel for drying
Step-by-Step Cleaning and Maintenance Guide
1. Remove Equipment from the Bath Area
Move the chair out of the tub to a dry, well-lit surface covered with a towel. This allows you to inspect structural joints from all angles safely.
2. Rinse and Wash All Surfaces
Rinse the entire frame with warm water to loosen soap scum. Apply mild dish soap using a soft sponge to wipe down the seat, backrest, and handles. Use a soft-bristle brush to clear debris out of seat drainage holes and height-adjustment push buttons.
3. Clear Mineral Buildup
If hard water leaves chalky white deposits on aluminum legs or plastic seats, apply a solution of equal parts white vinegar and warm water. Let it sit for a few minutes, gently scrub the area, and rinse thoroughly.
4. Disinfect High-Touch Areas
Wipe down armrests, seat edges, and backrests using a safe, non-abrasive disinfectant. This is especially vital for shared equipment or individuals recovering from surgery.
5. Dry Thoroughly
Moisture trapped in hollow tubing can cause premature wear. Wipe the frame dry with a clean towel, tilting the chair to drain excess water from internal frame joints before returning it to service.
6. Inspect Rubber Feet and Hardware
Regularly examine the slip-resistant rubber feet for cracking, uneven wear, or slick soap buildup. Clean the bottom of each foot to restore traction. Ensure all leg-adjustment push buttons are fully engaged at identical heights and check that frame screws remain tight.
Shower Chair Care Schedule
| Frequency | Recommended Action |
|---|---|
| After Each Use | Rinse away loose soap lather; allow proper bathroom ventilation to air-dry. |
| Weekly | Wash thoroughly with mild soap; wipe down handles, seating, and backrests. |
| Monthly | Perform deep cleaning to clear mineral buildup; inspect rubber feet and tight frame screws. |
When Should You Replace Your Shower Chair?
Even with routine care, durable medical equipment eventually needs replacement. Discontinue use and consider a replacement if you notice:
- Cracks or structural stress lines in the plastic seat or backrest
- Deep rust or corrosion on metal frame tubes
- Wobbly, bent, or unmatching leg extensions
- Hardened, split, or missing rubber feet
- Armrests or handles that no longer lock securely in place
Find the Right Bath Safety Solutions at Binson's
Finding the right bath safety equipment depends on individual mobility needs, weight capacity requirements, and bathroom dimensions. If you are evaluating options or need to replace a worn chair:
Shop Online
View our full catalog of tested, high-quality models directly delivered to your home.
Visit Us In-Store
Stop by your local Binson's location to speak directly with an expert and compare seating in person.




0 comments